In our new cabinet, we have about 3 large glass shelves, each 90 cm x 90 cm (35,43 inch x 35,43 inch), on each shelve we are going to put a diorama. The central theme of each diorama, will be “trains” … This tutorial is about the first of the 3 diorama’s, named “Crossroads”. The name “Crossroads” refer to the fact, that on this diorama, different type of “roads” cross eachother.
- On “top” of the diorama, we will have an arched bridge, where a BR52 is passing on.
- Under this bridge, we will have a road crossing it, where an old VW beetle and a motor with sidecar will be put on.
- Also, passing this bridge underneath, and “parallel” to the road, will we a small river, with a rowboat and a fisherman in it.
The base of the diorama will be a square MDF plate, measuring 85 cm x 85 cm. (33,46 inch x 33,46 inch) Because I’m a LED-freak, I will surely put LEDs in everything possible 🙂 (front/back-lights of the locomotive, VW beetle and motor with sidecar, and also some streetlights) The initial tought, was to build the bridge myself (from scratch), with “brass”-profiles, but while browsing Ebay, I came across a terrific bridge ! A Marklin arched bridge – gauge 1, item number 56291 ! For the price I paid on Ebay, I couldn’t even afford half of the I-beams I needed to build the bridge myself ! This bridge is scale 1/32, but if you know Marklin, you know they “round-off” all there measurements, so the bridge is actually perfect for scale 1/35 🙂 Yesterday this bridge finally arrived, so I assembled it (only 9 parts, if you don’t take the nuts and bolts into account) This bridge is a good “base” for my diorama. I will have to do some “modelling” on it. (e.g. take off the large bolts, detail and weather it more etc …)
Enough said, onto the pictures. (I did put my WR360 on it, for scale-reference only)
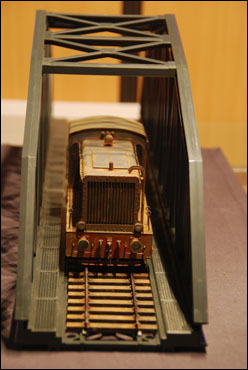
Front view, you can clearly see that the Trumpeter tracks fit nicely between the sides of the bridge.
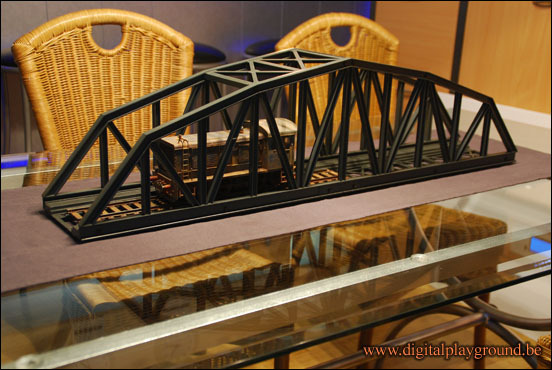
Sideview, this bridge is 90 cm long !
You are probably thinking, a 90 cm (35,43 inch) bridge on a 85 cm x 85 cm (33,46 inch x 33,46 inch) diorama ? Well, simple, the bridge/railway will be put “diagonally” on the diorama, which actually gives me about 120 cm (47,24 inch) tracklength !
To be continued …

