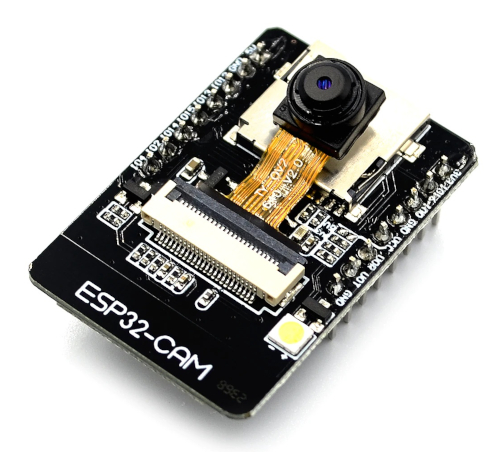
While in my search for a cheap video monitoring system, I came across the ESP32-CAM.
This is a very tiny and cheap camera (OV2640) with a max resolution of 1600×1200, with an ESP32 as the main “controller” of this “system”. (for a price, less then 10 euro !)
You can simply download a “webcamserver” from the examples in the Arduino IDE (after installing the ESP32 library of course), and have a webcam server over wifi, up and running in no time.
While “playing” with this module, I made 2 “modifications”, to have a better/more stable performance.
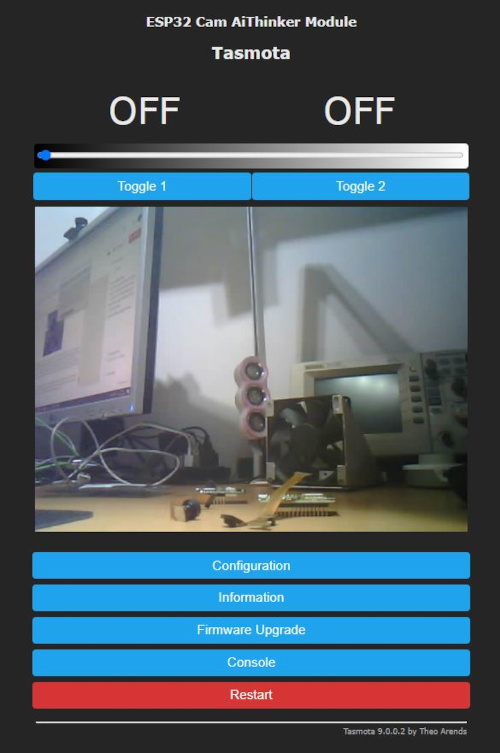
1. Replace the Arduino “webcamserver” with the Tasmota firmware.
(this gives for a higher framerate, and a cooler temperature of the PCB, and you can control the flashlight and other IO-pins)
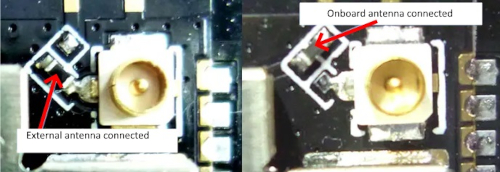
2. make use of an external antenna,
(Just cut one trace, and solder another … directly, without resistor)
(So you can use this device further away from your WIFI router)

Flashing the Tasmota firmware is not so complicated, but in any case, you can follow the step-by-step guide from Carlos Gomes here !
In case you need any further info about running Tasmota on ESP32, you can have a look here .
To get the image on your computer, you can use VLC or Agent DVR.
Agent DVR is formerly know as iSpy, a windows application to monitor multiple cameras.
Agent DVR is free of use, and works on windows,mac,linux, and even on RaspBerry Pi !
You can download it from https://www.ispyconnect.com/
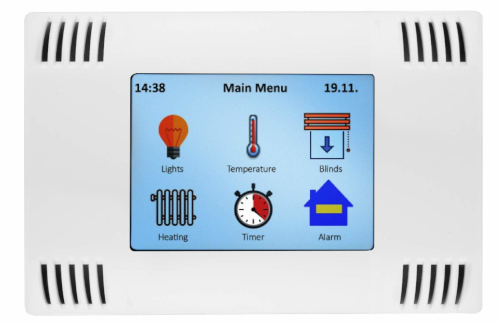
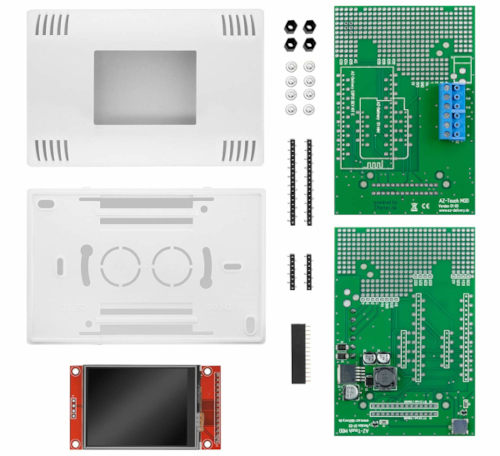
Furthermore, I still had an AZ-Touch laying around.
AZ-touch is a nice wall-mount device, with an 2.8″ ILI9341 touchscreen, and a place to put an ESP32 module in it. (they also have a version for RPI and Arduino MKR)
So, after a little fiddling with Arduino sourcecode, I managed to display the live-feed of the ESP32-Cam, onto the AZ-Touch !
I feel a project for a smart doorbell coming up 🙂
I also offer the Arduino sourcecode as a download here.
Make sure you fill in the necessary data in settings.h:
– SSID of our WIFI network
– password to connect to your SSID/WIFI
– host = IP-address of your ESP32-Cam
– site = URL-part where the JPEG still images reside on your ESP32-Cam
– port = communication port (mostly 80)
and that you install the libraries-folder in your arduino library folder, and that ESP32 plugin is installed.
(you need to be able to run the webcamserver example at least)